Add view counts to a Jekyll site
With minimal effort
So you’ve created your static website with Jekyll and all your posts are looking beautiful. But now you wish you had a way to track user interaction with the website: likes, comments, page view counts etc
I’ll break the above components into several articles to allow more focus with this article going over view count. If you’re interested in likes checkout out this article - it follows much the same format.
Back End
Ok, so you do need a back end. Your static website needs to have a place to store the viewcount, and it’s slightly horrible to have to store that in the static assets themselves. But I promise you don’t need a lot of code or be an experienced developer to get this done.
I’ve used AWS since they offer a generous free tier
and it’s very easy to get a quick back end off the ground.
I went for an API Gateway => Lambda => DynamoDB architecture.
Database
First you’ll need a place to store the data.
If you use AWS, DynamoDB is the simplest place to do this.
Go to the DynamoDB page in the AWS Console, create a new table,
use postId as the primary key and leave the other settings as default.
Well done! You have a table.
Handler
Then you’ll need some logic to write to the database.
You’ll need a handler to get the views for the current page
and one for adding a view when a user opens a page.
AWS Lambda is the simplest way to handle both.
Create a new Lambda using the DDB blueprint, I used Node 18 for my function.
In your function you’ll want to parse the postId we’ll be passing to the api in the route (more on that later) and then getting the viewcount item from the database. If there is no entry yet, we want to add and return a default one with 0 views.
1
2
3
4
5
6
7
8
9
10
11
12
13
14
15
16
17
18
19
20
21
22
23
24
25
26
27
28
29
30
31
32
const postId = event.pathParameters.postId;

// ... template code

case 'GET':
    command = new GetCommand({
        TableName: tableName,
        Key: {
            postId: postId,
        },
    });

    response = await docClient.send(command);

    body = response.Item;

    if (!body) {
        body = {
            postId: postId,
            views: 0
        }
        command = new PutCommand({
            TableName: tableName,
            Item: {
                postId: postId,
                views: 0
            },
        });

        await docClient.send(command);
    }
And do something similar for adding 1 to the viewcount
1
2
3
4
5
6
7
8
9
10
11
12
13
14
15
16
17
18
case 'PUT':
    command = new UpdateCommand({
        TableName: tableName,
        Key: {
            postId: postId
        },
        UpdateExpression: "set #views = #views + :views",
        ExpressionAttributeNames: {
            "#views": "views"
        },
        ExpressionAttributeValues: {
            ":views": 1,
        },
        ReturnValues: "ALL_NEW",
    });

    response = await docClient.send(command);
    break;
API Gateway
And now for the gateway to connect the API calls to our handler.
I went for a REST Api Gateway since it’s very fitting for this purpose.
Create a REST Api Gateway with default settings and add your methods like below, integrating the GET and PUT requests to our lambda function from above.
1
2
3
4
/views:
  /{postId}
    -GET
    -PUT
Make sure you add a
"Access-Control-Allow-Origin":"*"
response header somewhere, either in your lambda or the API gateway,
otherwise the browser will not let the request through.
Make sure to deploy your api gateway to a stage after making all the changes
and you’re all set!
Test your api with Postman or doing a curl
1
curl https://my-awesome-api.execute-api.eu-west-1.amazonaws.com/prod/views/1
Front End
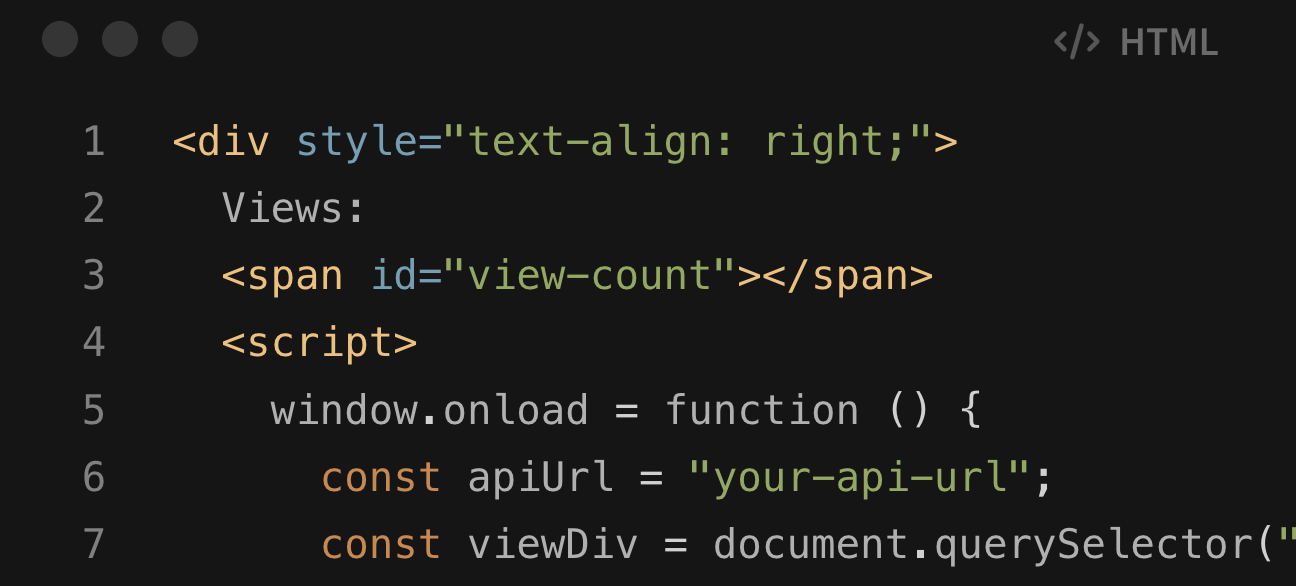
The below is enough for a simple Jekyll UI element you can re-use in your posts
1
2
3
4
5
6
7
8
9
10
11
12
13
14
15
16
17
18
19
20
21
22
23
24
25
26
27
28
29
<div style="text-align: right;">
  Views:
  <span id="view-count"></span>
  <script>
    window.onload = function () {
      const apiUrl = "your-api-url"; // TODO replace with your gateway url
      const viewDiv = document.querySelector("#view-count");
      // get views
      fetch(
        `${apiUrl}${postId}`
      )
        .then((response) => response.json())
        .then((data) => (viewDiv.textContent = data.views))
        .catch((error) => {
          console.error("Error fetching views:", error);
        });

      // add view
      fetch(
        `${apiUrl}${postId}`
        {
          method: "PUT",
        }
      ).catch((error) => {
        console.error("Error putting views:", error);
      });
    };
  </script>
</div>
Adding this function to window.onload ensures it’s only called
once per page load.
You can improve this by adding a cookie to track
unique users.
Use the setCookie and getCookie methods from this
tutorial
and add the following code
1
2
3
4
5
6
// load storage
const storedViewedPosts = getCookie("viewedPosts");
let viewedPosts = [];
if (!!storedViewedPosts || storedViewedPosts !== "") {
    viewedPosts = JSON.parse(storedViewedPosts);
}
You can then check whether a user has viewed a post previously and conditionally add a new view
You’ll need to pass a postId variable to your template.
For my case I’ve created a post-footer.html file where I included
the above template
(calling it footer.html creates a conflict with a built-in template!)
in the _layouts folder
that I can then include in every post
1
2
3
{
    % include post-footer.html postId="adding-interactivity-jekyll" %
}
Check out the full code here
Happy coding!